So you want to start a podcast and have no idea where to start? This complete guide will show you every step of the way:
Table of Contents
Planning
What is the goal of the podcast?
Goals are a really important thing to think about because they add purpose and direction. You may be focused on one overarching goal, but if you really ask yourself, you’ll probably find you have a lot of other goals too.
A good way to start mapping these out is by starting really broad and then gradually getting more and more specific.
So, you might start with simply “I want to grow my audience”, and then as you dive deeper, you can quantify that – “I want 1000 downloads per episode within 12 months”, and from there you can get even more specific.
That way, you’re breaking your goals down logically and in practical steps.
Choosing a topic for the podcast
You want to be fairly certain on the topic you choose. From the very first episode, you’re building a relationship with your audience and defining yourself. If, down the road, you discover you’ve chosen the wrong topic – you’ll be stuck with it for a while.
Remember, you’ll be spending hours researching, creating, talking and editing a podcast that revolves around the topic you choose. It makes sense that having an interest in the topic is an absolute must.
People appreciate passion. Even if your knowledge is a little lacking, if the passion is there, you’ll enjoy that time you invest and people will love your enthusiasm. Better still, you get to learn on the job!
Having a personal interest is a great start, but there are other elements in choosing a topic that you need to consider.
Are there business goals you want to achieve? What about your audience, what do they want? Have you discovered a gap in the market that your podcast could fill?
Try to find a popular topic that truly piques your interest and which doesn’t already have lots of other podcast hosts talking about it. Potential to make money is also important but more about that later in this guide.
Who is the target audience?
Your podcast topic is often a great indicator of your target audience, but it can go both ways. Thinking about your target audience could also be a good way to narrow in and help you pick your topic.
Think about the kind of people you envision listening to your podcast. Where are they? What else are they interested in and what are they doing? What are they buying? Check out demographic information on your target audience and look at real stats to give you useful insights.
Looking from a broader perspective – stats from a survey by Acast indicate that around 80% of podcast listeners seek out podcasts for “self-education, and self knowledge”.
From this, you can deduce your listeners are likely going to want to learn something from you. Your podcast should add value to their lives and fulfil the needs of your listeners.
Another thing to consider is how much you want to deep dive. Within a topic there are loads of sub-topics. Understanding those sub-topics will help you target your audience better, cover your audience more broadly and are less competitive the more niche you get.
Who will host the podcast?
Will your topic or format be better suited to a single host, a co-host, or a team of hosts? Some formats, like in depth interviews or story based podcasts are better done solo.
If your main game is to entertain or you love banter and fresh conversation, having a host or multiple hosts might be a better choice.
What’s in a good co-host? Someone you can bounce ideas off is great, but there are other important qualities too. Your co-host should be reliable and motivated; you both need to show up each week.
You also want your co-host to have a good balance of being talkative as well as sharing the stage with you.
Another thing to consider is whether you’ll go live with your co-host or collaborate remotely. Having that extra flexibility of doing the show remotely could be a good way to make sure the podcast always gets done.
Will you have guests on your podcast?

Any podcast can be successful without guests, but there are huge growth opportunities for both parties. So much so, that some podcasts have guests pay for appearances, or vice versa.
One thing to consider is, will you go local or source guests from beyond? This will affect whether or not you can interview in your studio or remotely. You might end up having a mix of both, but will need to be prepared for both audio setups.
Guests should be easy to find if you know the central theme of your podcast. You can easily source guests just using social media, online groups and keywords or hashtags.
Other ways to find guests include other podcasts close to your target audience, attending conferences and networking events, or offering an application form on your website.
Doing the interview-based format might gain you popularity points, but it will mean you’ll be expected to consistently land guests.
This will probably mean investing less time in things like research and scripting, and more time scheduling and sourcing people.
If you’re more extroverted and people focused, having guests can be a very rewarding choice. If you’re less about people and more about concepts and ideas, you might feel more drawn to scripted and story based formats.
Frequency of episodes?
With podcasting, there really are no strict rules; every podcast is different, but if there’s one thing successful podcasts have in common, it’s consistency.
If you’ve decided to release an episode once every week, two weeks or each month – it’s best to stick to it and get your listeners expecting to hear from you at that regular time.
You’ll build up a loyal listenership and it’s a great way to build your commitment to the podcast.
How long should each podcast be?
There’s definitely a sweet spot when it comes to deciding how long you want your episodes to run for, but this comes down to other factors too; what’s your format? Are you very talkative?
In some cases, the longer format is sometimes ideal. Take the Joe Rogan Podcast, for example. There really aren’t many podcasts out there that can have my total attention and focus for 4 hours straight like JRP! I think it’s a mix of the interview format and Joe’s pure charisma and love of conversation.
Another thing to consider is how frequently you plan on uploading. If it’s more than monthly, it’s better to keep things shorter and in smaller segments; around 30 minutes is perfect.
This way, you’ll make things achievable for you and your audience. You want to easily slot into their day.
Think about what you’re doing when you listen to a podcast – many people are busy commuting, driving, working, working out… Podcasts are now becoming the way to educate and entertain you on the go.
Choose the branding and make a logo
Your podcast’s logo and branding is the first thing people will see. Your audience will be browsing on their app, see your logo and then read your description and tagline. If your logo is bad and doesn’t catch the eye, they will just keep scrolling.
A professional-looking logo is therefore essential. This isn’t something you want to try to do yourself. You really need to get this done by a professional graphic designer if you want your podcast to stand out. A good place to find a graphic designer is fiverr.com – There are lots of talented designers on there with very competitive prices.
For your information, the logo image needs to be high-quality, 3000 x 3000 pixels and in JPG or PNG format. But don’t worry too much about the technical details. The designers at fiverr know what they’re doing. Just tell them it’s for a podcast logo / cover art and they’ll know exactly what the technical specifications are for that.
If you’re on a budget, you could make one yourself for free using apps like Canva or Logomaker. They’re both intuitive to use and if you have a creative eye, you could easily make something sleek and unique. But honestly, I don’t advise it. A homemade logo never looks good. I prefer to leave it to the professionals. It’s money well-spent.
Think of a tagline and make an intro
Your intro is played at the beginning of each episode and your outro plays at the end. It might include some music, sound effects, episode information, your identity and the podcast’s purpose (aka the “tagline”).
Your tagline is a part of how you present yourself and your brand. Basically, it’s part of your show’s intro and sometimes the outro too, and acts as a hook or theme.
People love a bit of repetition, because it creates a sense of familiarity and comfort. Think of it like a hook or chorus in a song.
Here’s an example from Pat Flynn’s “Smart Passive Income” podcast: “Welcome to the Smart Passive Income Podcast, where it’s all about working hard now so you can sit back and reap the benefits later.”
So, a few guidelines to an effective tagline: keep it simple, around 20-30 words, and make it something memorable. You want it to be a clear, concise and catchy summary of what you’re doing and what your audience wants.
I strongly recommend that you use a voice actor to record your intro and tagline. It will make your intro sound professional and add credibility. You can find voice actors on fiverr for very competitive prices.
Your intro music is another way to create a mood and establish the tone of your podcast.
If you’re on a tight budget, you can use royalty-free music (just make sure you find something unique!), or you could commission a musician to make you a short jingle for a few hundred dollars. Or if you’re musically inclined, you could make something yourself!
Podcast recording equipment and hardware guide
In this section, I cover the hardware needed to record a podcast. I discuss software in a separate section later in the guide.
There are two main ways to organize your set up. You’ll be recording either directly through the computer or with hardware using an interface that’s connected to the computer.
Direct connection
With USB microphones, you connect the microphone directly into the computer’s USB port without the need of an interface or any additional hardware. This works well if there is only one person recording.
Audio interface
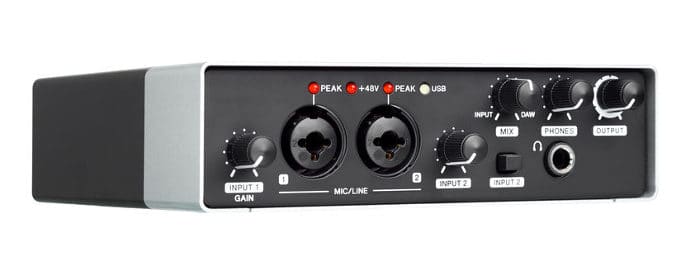
If you’re planning on recording with an on-site co-host or a guest, then you’ll have more than one microphone input to record. In that case, it is better to use several XLR microphones (XLR is the name of the connector on the microphone.)
Since computers do not have XLR ports, you need an additional device called an “audio interface” that sits in between your computer and the XLR microphones. So you plug your XLR microphones into the audio interface and you plug the audio interface into the computer.
The connections from your interface to the computer can vary. What you’ll mostly come across are USB, but some use Thunderbolt or USB-C so make sure your computer has the input or you’ll need a converter.
The price of your interface will vary based on the features and build quality. A good, basic interface with 2 XLR inputs should cost you around $200, and there are quality interfaces with 4 inputs at about $500.
Audio mixer
An audio mixer gives you more control over each individual channel with the ability to add various effects too, like reverb or even EQ.
Firstly, it’s important to note that your mixer is distinct from an interface. While your interface purely converts analog signals to digital, a mixer takes multiple signals that are sent through it.
A mixer does add another layer of complexity into your setup and while it’s not a basic bit of kit, it can improve your workflow.
Microphones

One thing that your listeners will expect is good quality audio. Whatever you do, don’t use your computer’s internal microphone or smart phone!
The two types of microphone you’ll come across for podcasting are USB and XLR.
XLR microphones are preferable for a number of reasons. It’s great if you’re hosting a show with co-hosts or guests, because you can easily hook up another XLR to your interface or mixer and you’ll have multiple inputs.
XLR microphones also record much cleaner, crisper audio. You’re much more likely to have issues with digital noise or sound drops going via USB.
However if you’re on a tight budget, USBs are definitely the cheaper option, plus they’re more portable. USB mics can range from between around $50 and $200, but there are excellent quality USB mics at around $100.
XLR microphones are more costly (you can find a good one for around $100 -$400) and they do require other equipment, but your audio quality will be a lot better and you’ll have more inputs.
If you want to go down the XLR path, you’ll have another choice between either condenser or dynamic mics.
The difference here is that dynamic mics are, well, exactly that – they are dynamic! This means the sound needs to be close to the mic, otherwise it isn’t picked up.
This makes them great for noisy environments and creating a warmer sound. They’re also pretty durable and resistant to moisture so this could be the better choice if you’re planning to co-host or have guests.
Condenser mics are the opposite in terms of how they capture sound – they literally condense sound. So even something as subtle as ambient room noise can get picked up by these mics.
So, you might be asking… What’s the difference between a cheap and an expensive mic? More expensive mics have better quality parts and take better recordings. They’ll have more clarity and require less work in post-production.
Microphone stand / shock mount
A stand and shock mount are essential. These will keep your microphone secure and less sensitive to unwanted noise. It’s a lot better having one less thing to think about when you’re mid-show!
A shock mount allows your mic to be freely suspended in a basket, making it flexible enough to resist sounds that would usually vibrate through to the mic, like bumps to the mic, floor or table.
With stands, you can go for a boom arm or table top. There are floor stands, but unless you’re podcasting standing up, your best bets are on a table top or boom arm.
The boom arm is pricier at around $150. It is a very popular choice and the majority of podcasters prefer this setup. They usually have 360° rotation, making them flexible and quick to start recording, you just pull the mic toward you and start talking.
Boom arms also save you a lot of desk space, leaving more room for notes, drinks and whatever else you need each episode!
If a boom arm is out of your budget, tabletop setups are still a great option and only cost around $30.
They’re versatile in the sense that you can have them very close to you and still make eye contact with your guests or co-hosts. With boom arms – these can get in the way of your view!
Microphone cables
The two mic cables will just be either the USB type or XLR. The difference between them is just where they’re plugged in.
Your USB cable should come with your USB mic and plug straight from the mic to your computer. This makes them a little more convenient!
XLR cables, however, can vary in price (from about $5 – $50), and it does make a difference. Why?
Generic, cheap cables from China will carry more noise through, whereas spending a little more will get you clearer audio and more durability. This is because their wiring, shielding and design are better quality.
Don’t stress about just getting the most expensive one; a mid-range XLR should serve you just right and can rival the most expensive ones out there.
Pop filter
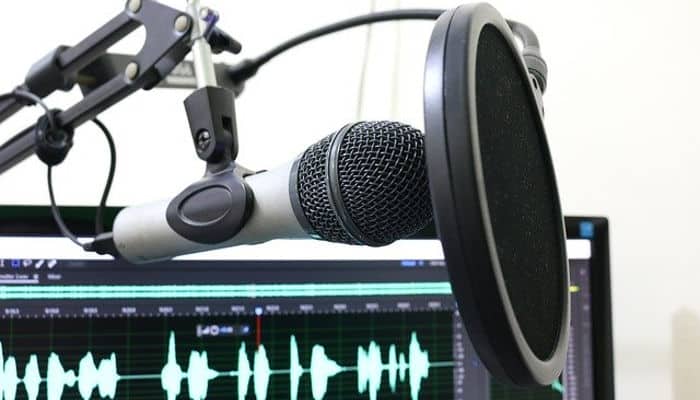
A pop filter functions similar to the shock mount. It’s basically a screen made of plastic or metal and it’s used to protect the mic from picking up plosives.
Ironically, the word ‘plosives’ itself demonstrates what it means. Plosives are basically consonant sounds that let out a pop of air (like your T’s, P’s and B’s). These end up sounding like thumps in your recording and are a real pain to remove in post production. A pop filter removes those thumps at source. Prevention is better than cure!
Soundproofing and acoustic treatment
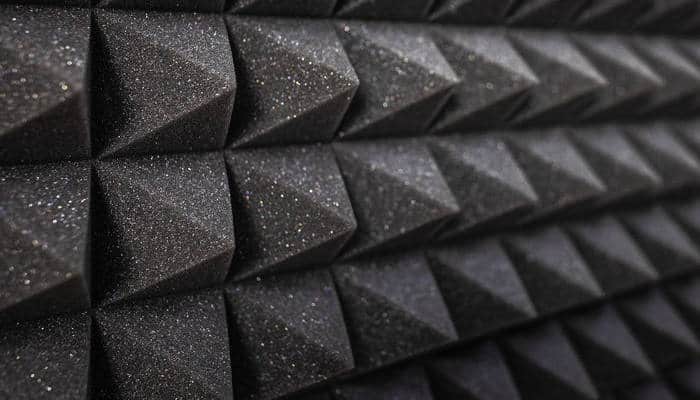
I don’t want to get too technical here, but I’ll quickly explain some basic principles of sound and how it behaves so you understand why acoustic treatment works.
Sound reflects (and sometimes refracts). In other words, it bounces off stuff. Acoustic treatment handles these reflections and the most common methods are by absorption and diffusion.
Placing absorptive material in your studio reduces reflections, since it absorbs sound. Anything between your sound source and the wall itself works.
Diffusion is when sound hits a surface with many angles and ridges. The many reflections break up the sound, forcing it to scatter and taper off.
You can buy pretty cheap foam pieces that are both flat and ridged for effective absorption and diffusion.
If you’re on a tight budget though, there’s a pretty simple way to get your room as “dead” as possible; fill it with stuff! So long as you don’t mind practical clutter, using curtains, bookcases, and even using rugs against your walls will act as excellent soundproofing for your space.
PC or laptop
You’ll be using a PC or laptop to run your editing / post-production software. (I cover software choices in a later section)
I’m not going to take sides with using PC or Mac here -They’re both equally effective for audio production and have their own pros and cons. There are excellent audio programs for both platforms.
So long as you’re running at least Windows 7 or OSX 10 on your PC or mac, you’re good to go.
Most computers these days will support your podcast adventures just fine. You’ll need a minimum of 4GB RAM and ideally 8-16GB for optimal audio processing. In terms of your processor, an i5 and up or AMD equivalent will do the job very nicely.
Raw audio files can get pretty big so if you’re planning on storing them all on your internal hard drives, you will need to have plenty of available space.
However, I recommend keeping backups on an external hard drive or in the cloud. – That way, if anything goes wrong with the computer (touch wood!), your files will be safe.
Running a laptop versus desktop really comes down to what’s more practical for you.
The advantage of a desktop is that they are easier and cheaper to change individual parts (hard drive, screen, keyboard) if anything goes wrong or you simply want to upgrade
A desktop can also give you tons more storage and processing power on the cheap, but portability basically goes out the window. So, wherever you’ve got it set up, that’s where you’ll be recording, editing and everything else!
Laptops are often more expensive than desktop PCs for the same specifications. Laptops obviously have the benefit of being portable. If you want to live the digital nomad and travel while you work, then a laptop is a necessity.
Planning and recording an episode
Now that you’ve got your hardware, let’s go through the steps for actually planning and recording your podcast episodes.
Plan the episode
You have to start somewhere and your best ideas will come from brainstorming and creating a plan.
You might have more of a birds-eye view of your podcast and plan out multiple episodes or you can take it one episode at a time. I recommend planning multiple episodes.
Think of your podcast like an album. Your work should function as a cohesive, fluid whole. Artists plan out their tracklists carefully for the same reason!
Creating a mind map is a really helpful tool for planning your podcasts. Basically, you start with your central idea (in this case, your topic), and you branch out all the sub-topics, then sub-sub-topics, and so on.
You’ll end up with a pretty complex web of what you can cover in your podcast and this could be really handy for swiftly planning multiple episodes in one go. The mind map will also help you flesh out ideas that you probably wouldn’t come up with otherwise, so I recommend giving it a go!
If your podcast is interview-based, you’ll need to also plan out guests along with the topics you want to cover. Send out reminders and if they’re not coming into your studio, make sure you discuss their audio set up as well as how you’re meeting. Google Hangouts and Skype are great options.
Depending on the format of your podcast, you might be thinking of using a script. This is definitely not essential, and in some cases it can make your podcast sound a little dull and clinical.
I’d say more often than not, you can’t go wrong with bullet points. This way you can stay on track, but also allow that free flowing, conversational style that podcast listeners love.
Record your episodes
Once you have your gear set up, you probably won’t need to touch it again other than to turn it on or plug it into the computer. Once you’ve set the hardware up, install any drivers you need for the mixer or interface (you’ll only need to do this once) and launch your recording software (more about software in the next section.)
You’ll need to set up your inputs in the software, then do a quick test to make sure you’re recording – it’s incredibly frustrating to think you’re recording, only to find out that the whole time, you weren’t (this has happened to me a couple of times, so please, learn from my mistakes!).
If you’re inviting guests on to the show, contact them before the episode and confirm they’re good to go. Both you and your guest can either record your own audio (known as “the double ender”) and your guest can send you the raw file after.
This is probably the easiest setup, and you’ll get the best quality audio if you’re each recording yourselves. In saying that, it’ll take you a little longer in post as you’ll need to sync up the tracks.
Also, some guests might not know how to set themselves up to record, so it’s important to have a backup method.
Your other option is to record both yourself and your guest. The upside of this method is that it’s more streamlined. – There’s no need to synchronize your tracks or rely on your guest to record and send you files.
However, depending on the software you use, you might not be able to record external audio, in which case, you’ll have to get another program (which may cost you). Another downside of this method is if your guests internet drops out, it’ll be included in the recording.
You can use Skype’s inbuilt feature to record your calls, or if you’re recording video too, Camtasia is an excellent option.
Your finished audio will be a raw unprocessed .WAV file, or if you’re using a Mac, you might come across their .AIFF format.
Editing and post production
This is the part where you can really bring your podcast episode together and get creative.
Your post production process will include 3 main tasks; editing, mixing and mastering, and they’re all pretty fun and interesting!
Editing is mainly syncing and cutting the raw audio. You might cut out lowlights, pauses or random noises, or even move bits around and create a story.
If your initial audio setup is good, you won’t need to do much mixing; you might just skip straight to mastering, slap an EQ and limiter on there.
Once your work is mastered, it’s ready to render out and this will usually be in MP3 format. What you’ll then need to do is add the “Metadata” or what’s called ID3 tags to your file.
Your metadata contains the episode name, artwork, podcast title, date published, and so on. This properly categorizes you so you’re indexed and searchable, making it easy for your audience to find you.
You can add ID3 tags to your MP3 files using iTunes, or even VLC Player.
Remember, you don’t have to do all this by yourself. If you’ve got the funds or down the line you need to scale up your project; you can easily hire an audio engineer to look after the audio for you. Expect to pay around $60 per episode for polished, high quality results.
If you do decide to do the post-production work yourself, you’ll need to have the right tools. Let’s talk about your software options so you can finally get down to publishing and distributing your podcast!
Podcast audio recording and editing software
Your DAW (Digital Audio Workstation) acts as the central hub for everything to do with audio in your podcast, including the recording and post-production process. Some programs are available free or come with your computer and others are paid.
Generally, your DAW will support audio recording, editing, effects, mastering and even musical and visual elements, including MIDI and video.
Audacity
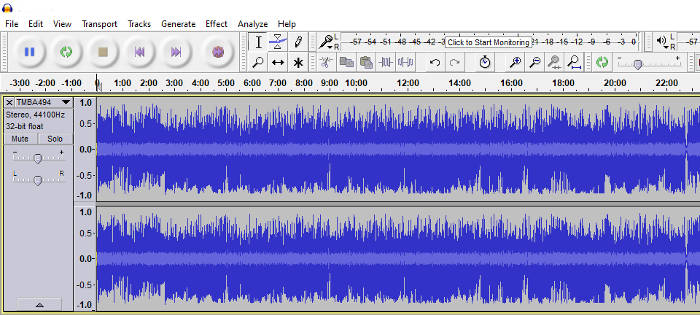
Audacity is free, available on Windows, Mac and Linux, and it’s open source (meaning anyone can develop and make changes to the software code).
However, there are some functional limitations that may cause you to outgrow the software. For this reason, I wouldn’t consider it a DAW, more of a basic audio editor and recorder.
Its biggest weakness is that all edits are destructive. This means you’ll need to save a copy of your original audio file, because any edits you make will change the source file and you’ll need to go through your undo history to revert back.
Another downside of using Audacity is that you can only use one effect with real-time processing. This means if you’ve added an EQ effect and a compressor – you’ll only be able to tweak the settings one at a time.
Having said that, Audacity is simple and it will let you get the job done with plenty of effects at your disposal.
Audacity also has a large community forum dedicated to podcasting, so answers to common questions or issues should be easy to find.
Reaper
Reaper is ideal if you’re looking for something lightweight, powerful and intuitive to use.
It’s paid software (around $60), but it’s very intuitive to use with minimal learning curve and is super lightweight (the program itself is only a couple of megabytes, which is pretty cool considering how powerful it can be!)
Another great thing is it’s flexible. You can easily get started with it as a beginner and then go on to learn some pretty advanced tricks and customizations as you get more advanced.
For example, you can create your own shortcuts in Reaper – one that I think really comes in handy is how you can automatically set it to chop pieces of audio at set intervals.
Garageband
Garageband comes pre-installed if you’re using a Mac, iPad or iPhone, but it’s important to note that it’s exclusive to the Apple platform.
There aren’t many downsides but one worth mentioning is that there’s no real cross fading. If you want to fade one piece of audio into another, you’ll have to create an additional track and manually adjust the volume in and out.
One great feature is its compatibility with the more advanced “Logic Pro” software. If you decide to upgrade from Garageband to Logic Pro, all your project files will open and work.
Garageband has plenty of features and it comes with a lot of samples you can play around with and use.
How and where to publish and distribute your podcast
When you think of distributing a podcast, you’re probably imagining iTunes, Google Play and Spotify, right? Well, technically you are correct. That is where they end up but it’s not where they initially go!
These platforms are known as podcast directories – nothing is actually stored with them, it’s only directed to them.
Instead, all your episodes are stored on what’s called a podcast host. Along with hosting they’ll distribute your podcasts to the directories.
Hosting the podcast
So, to give you the full rundown… Hosting companies upload your audio to the podcast platforms and generate the RSS feed for your podcast.
There are some great options for hosting with different features.
Among the best is Podbean, which has a free forever plan that comes with 5 hours storage space. It also has mobile friendly players ready to go and some basic stats. This is great if you’re starting out and as you build your audience, you can upgrade to access more advanced stats, better design features and get more space.
Buzzsprout is ideal for a new podcast and also has a free forever option with 2 hours of audio a month, with episodes being removed every 90 days. It’s very intuitive to use and they’re always coming out with new, useful features.
Post each episode on your website
After you have physically hosted your podcast episodes using one of the above hosting companies, you can then link to those episodes from your website.
So just to be clear, you will not be physically hosting your audio files at your website host. Your website will simply have an embedded player on the front end that points to the physical files stored on the third-party podcast host. By keeping the podcast hosting separate from your website hosting, your website will be nice and fast and won’t crash.
YouTube

Think about this, it’s totally free to upload videos to YouTube. People love to engage with content and the social media aspect of YouTube will allow your audience to directly communicate with you and your listeners.
Uploading your episode videos could open you up to a whole new audience, too. Stats show 43% of podcast listeners actually went to YouTube for their podcast fix over both Apple (34%) and Spotify (23%).
Some of the most famous podcasts are also uploading to YouTube. Pretty much everyone knows the Joe Rogan podcast or the H3 Podcast (I actually prefer watching these to listening!)
Some podcast hosts will actually upload to YouTube for you, including Podbean and Libsyn.
Uploading to YouTube also means you’ll have to record video too, so this will add another element to the process. I don’t recommend uploading just audio as YouTube isn’t a fan of that.
Something to consider is that YouTube is a monetized platform, so you’ll have to follow their content guidelines to be eligible for Adsense.
How to promote your podcast
Once you’re ready to publish, you’re ready to promote. A surprising number of steps you can take will cost you nothing and will actively build your audience.
Social Media
Social media gives everybody a platform to push their stuff to people across the globe. It’s a great medium to share soundbites, teasers and even behind the scenes content with your audience to build a buzz about what you’re doing.
By using the power of hashtags, groups and communities as well as quality, regular content; you can draw people in to listen to your show. Twitter and facebook are the best platforms for this.
Submit Your Podcast to Podcatchers
Podcatchers (or aggregators), are apps that play podcasts. They can also automatically download episodes as they’re posted.
Some podcatchers like Overcast or Stitcher have cool features like being able to share a short audio clip or create your own playlists.
Podcatchers are great for promoting yourself because your audience won’t really have to come looking for you every time they want to listen to your latest show – you’ll go to them!
Leverage your guests’ audience
Interviewing guests on your podcast, or even being a guest on another podcast is a really great way to expand your listenership and cross-promote.
If you’re having guests on, make it easy for them to share content the day it goes live. You could send them a quote card from the interview, or a short sound bite or teaser with your links embedded.
The idea here is to make it easy for their audience to find you. You could find yourself with a lot of new fans!
Search engine traffic
Google search is an excellent free source of traffic for a website and podcast. However, getting your podcast and website showing up at the top of Google’s search results does involve a bit of work. This is where “SEO” comes in. SEO stands for “Search Engine Optimization”. SEO is essentially making sure that your website is in a format that google can read and understand in order to include it in its search results.
Having a transcript of each of your podcast episodes on your website is a good strategy. – This ensures that Google’s algorithms can read and understand what your content is about. Consequently your website (and podcast) will be more likely to appear in Google’s search results.
Having a well designed, mobile-friendly website that loads fast is also going to help your site rank higher and access a wider audience.
Incentivize positive reviews

Social proof is important in the podcast game and will get you noticed on iTunes. How do you get listeners to leave reviews? The starting point is to make sure you have an excellent podcast, of course. If people think something is good, they usually want to rave on about it!
Other ways to encourage reviews are by hosting giveaways, or featuring listeners’ opinions or comments in return. Get creative with how to reward your listeners and you’ll have a steady flow of stellar reviews.
How to make money from your podcast

There are a lot of opportunities to make money from your podcast as you grow your audience, but even new podcasts can start monetizing too. Here are some common methods:
Sell your products / services
There are practically limitless options for this and it all depends on what you do. If you’re a coach or specialist in a field like law or finance, your podcast could be an excellent way to gain new clients.
You could also offer an ebook or online course with exclusive content. These are great mediums to teach something or really dive into one topic in a meaningful way.
Sponsorship
Generally advertisers want you to have at least 5k listeners per month before you start thinking of this option.
When you’re ready, podcast ad networks will hook you up with advertisers and do all the work for you. They’ll find the advertisers, organise your rate and even provide the script.
One of the biggest is Midroll, which is made by Stitcher. An excellent choice if you’re still a small podcast is Podgrid – They don’t mind if you’re still starting out and will find advertisers that are keen on supporting the little guys too!
Once you have built up a decent audience, you can contact companies directly and see if they’d be interested in working together.
Affiliate marketing
Affiliate marketing is when you promote third party products or services in return for a commission. Basically you need to get your listeners to click on an “affiliate link” which takes them to the 3rd party website that is selling the product or service.
Add your affiliate links to your show notes on your website and then tell your listeners to check out those show notes for the links to all products mentioned in that particular episode.
For legal reasons, you must disclose to your listeners that you earn a commission from sales that come from your affiliate links. This is an FTC requirement and they do enforce this. You need to give the disclosure orally during the podcast and also in written form next to the affiliate links in your show notes. This is not a bad thing. By doing so, you are showing yourself to be honest and transparent.
If you’re giving out affiliate links, make sure they’re easily visible and clickable. Most affiliate links have long, complicated URLs. You can use URL shorteners like Bitly to customize your URL’s and make them more attractive for your audience to get more clicks.
Crowdfunding
You could set up a Patreon account and request donations from listeners. This is a great choice for entertainment and commentary channels, because you can offer your audience premium or exclusive content.
There are other crowdfunding platforms out there, like Kickstarter or Indiegogo, but Patreon is really the only one that’s based on an ongoing monthly subscription model, which is ideal for you and your audience.
Charge guests to come on the show
Some podcasters, like John Lee Dumas charge guests a fee for appearance. On his “Entrepreneurs on fire” podcast, he charges $3500 to appear! I hope you are starting to see the real potential of podcasting.
The clear benefit here is you can make a lot of money doing this, but you’re also giving up some creative control. You’re not picking the guests; the guests pick you.
In saying that, generally your guests are very keen to promote what they’ve got going on, so your show is likely to be shared a lot more often.
When it comes to making money from your show, combining these methods is a popular approach. By doing this you’re making your overall strategy stronger by covering all the bases.
Conclusions and next steps
Podcasts are a fantastic, ever growing medium to tell stories and connect with people that share your interests.
You don’t need to be an expert to get your podcast going. Along with this guide, all you really need is the interest and some time!
I hope that this guide on how to start a podcast helped you. Feel free to share a link to it on social media.
Great post Andrew. Happy to feature you over at union4.
This website was… how do you say it? Relevant!! Finally
I have found something which helped me. Thanks a
lot!